Sunday, January 5, 2014

Braided Fleece Blankets Tutorial


Since I made Ally a quilt  for Chirstmas, I felt I should make everyone else something in that category.  So I decided on making my husband and other 3 girls fleece blankets.  Joann's had a great sale on all their fleece so it didn't cost a whole bunch to make these blankets.  I used 1 1/2 yards for both the bottom and the top for the girls and I used 2 yards for my husbands.  I wish I would have gone a little bigger for his because when he pulls his up to his chin his feet are poking out.  I decided to braid these blankets rather than tie.  It was so much simpler and it not only looks great but is way more comfortable than cuddling with knots.  


After they opened them Christmas morning I found myself sad that I had not made myself one, so the next day I had to go get me some fleece and make another one.  Ally is cuddling with mine in this picture.
To make the blanket you need 2 pieces of fleece cut to the size you are wanting the blanket to be.  I lay them down with the bad sides together and cut all the sides to where they are as even as possible.
I then cut out a 2 inch square from each corner just like in this picture. 
After cutting out the squares on all 4 corners we want to cut the edges just like you do when are tying it rather than braiding.  You cut 2 inches into the fleece with the flaps being 1 inch wide.  I line the blanket using masking tape or painters tape 2 inches up to help keep all the flaps even.  I also have my cutting mat laying underneath.  

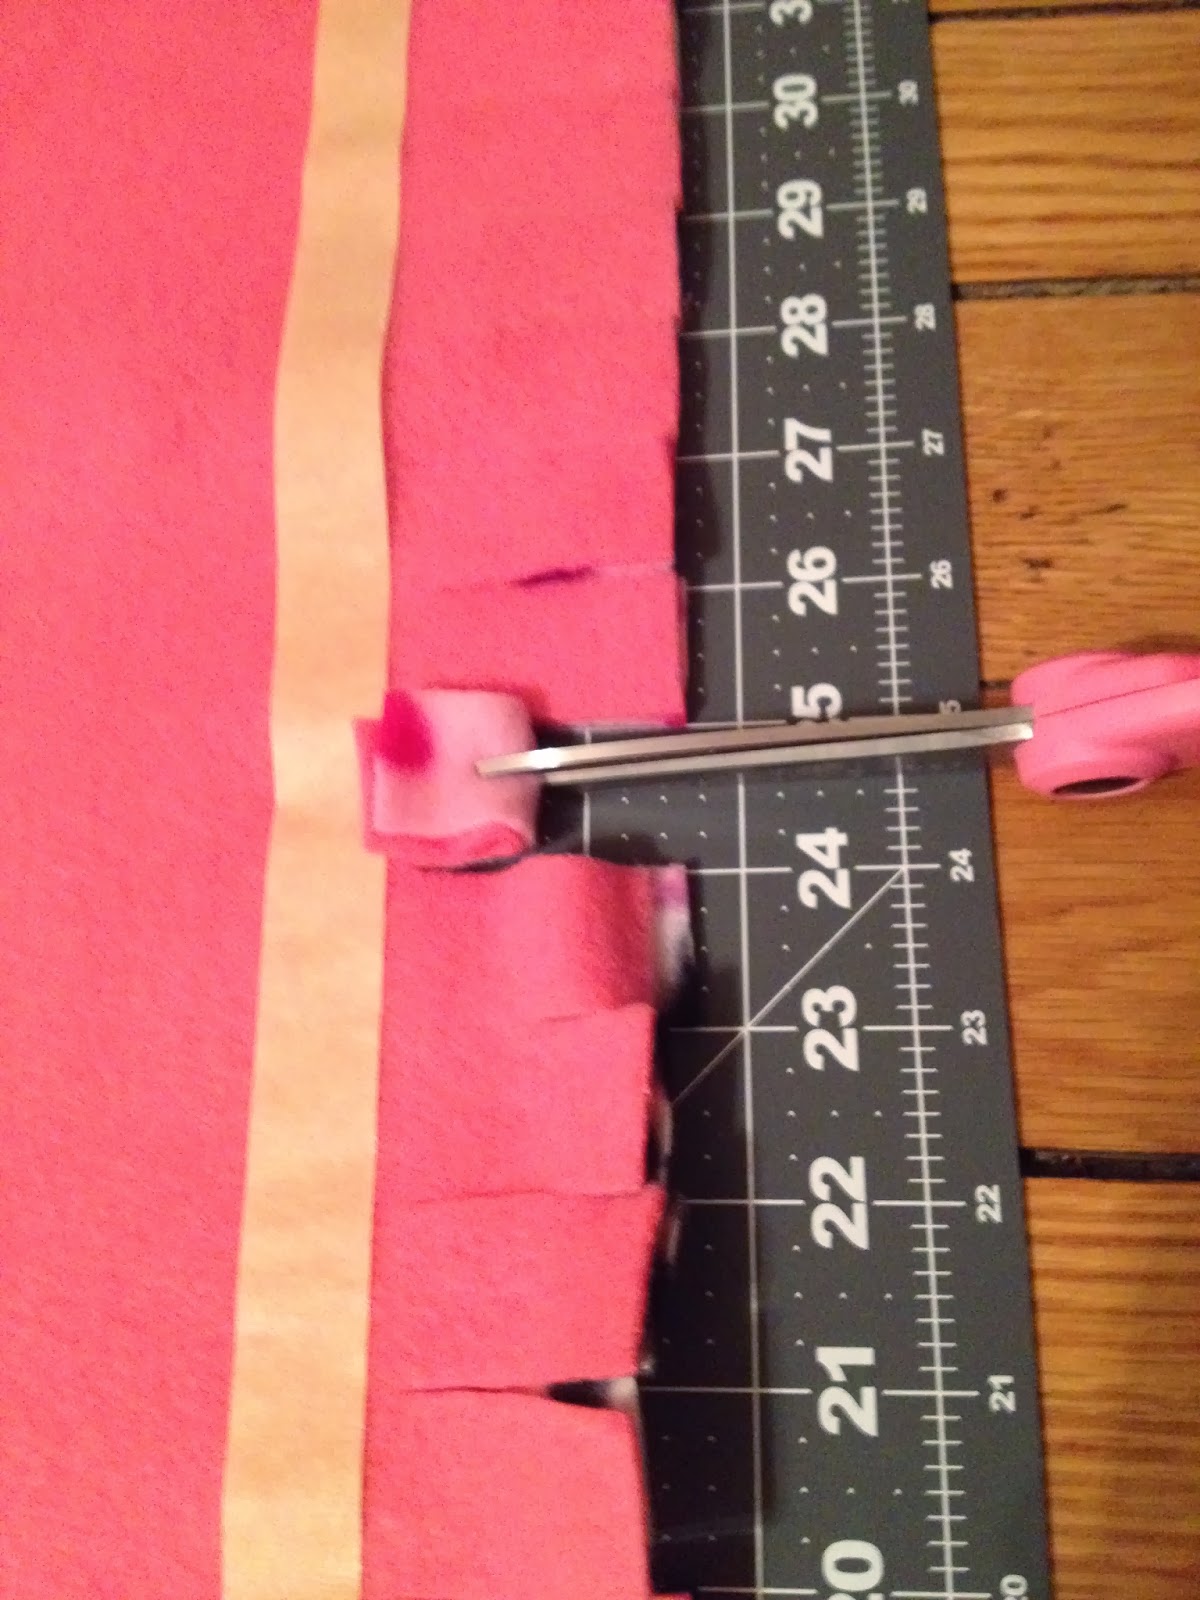
With all the flaps you want to make another cut through both layers.  This cut is just a slit in the middle of the flap just like in this picture. 


Now that your back is killing you from bending over this blanket doing all this cutting we get to the relaxing and enjoyable part.  Once you have finished with the cutting you can take your blanket and relax in your recliner to do the rest.
I use a crochet hook for this part but you can also use a bent paper clip or something similar.  It's totally up to you.  
Finding a starting point you are going to put your crochet needle through the top of the slit of your top piece of flannel then through the slit on the piece directly below the first one.  You then pull the second piece through the first just like in this picture.


Now go all the way around until you get to the last piece.  
With this last piece you are going to pull it through the flab you started with then cut up the center of that last flap to make it two flaps. Pull one of those newly cut flaps out of the slit of the first flap and tie a knot with the the other half flap.

And you are done!  


Monday, June 17, 2013

Girls Camp "Daughter of a King"


I decided that I wanted to share one of my favorite books with the girls while at camp.  This book is called “Daughter of a King” by Rachel Ann Nunes.  This book was given to one of my daughters several years ago for her birthday from her Grandma.  There is such a wonderful message in this book and it truly pertains to all of us.  I wanted to have something to give the girls to go along with this.  I have a whole bunch of these wooden squares left from a project I was doing last year, so I thought I could make a pendant out of them.  I printed out the little message and mod podged them onto the painted wooden squares.  After several layers of mod podge I put some resin on top and let dry overnight.  I then drilled the holes and threaded onto some cord.  I embellished with some beads.


I will have to let you know how these do at camp.  Wish me luck.


Sunday, June 16, 2013

Girls Camp Prescription Bottles


I found this idea off of Pinterest.  Where else would I go?  I am so addicted to that site. Aren’t we all?   I found these neat pill bottles with a cute little prescription for skittles geared towards Girls Camp.  I decided to make these as one of my pillow treats. The site I got this from a site called Burlap and Denim.   You can download the labels from this site. The label says that the quantity is 100, but I could only fit about 60 skittles in each bottle, so I’m going to give each girl a prescription for 1 refill.


Saturday, June 15, 2013

Girls Camp "Oh The Places You'll Stand!" (spin-off of Dr.Sues's "Oh The Places You'll Go!"

Oh The Places You'll Stand!

Girls Camp is right around the corner and I have been having all kinds of fun getting ready for it.  This year’s theme goes along with the mutual theme of “Standing in Holy Places.”  Our camp theme is a twist on Dr. Seuss’s book, “Oh, The Places You Will Go!”  It’s “Oh, The Places You Will Stand!” 

I am one of the leaders over the 4th year girls.  I have been so excited about going to girl’s camp this year.  I haven’t been to girl’s camp since I was 17.  I have been surfing the web to find ideas to go along with our theme.  I found so many and of course could not use them all, but I found some that were a must for me. 

I found this twist on the book “Oh, the Places You’ll Go!” on Jessica Herbert’s Blog, Sherbert CafĂ©.  http://sherbertcafe.blogspot.com/2013/02/oh-places-you-stand.html.  I absolutely loved it.  I then found pictures from the story that I pasted to paint and added the words.  This is how it turned out.


Monday, April 1, 2013

Peanut Butter Fingers


This past Saturday I had the opportunity to watch Young Women’s Conference with the beautiful Young Women in our ward.  It was indeed a great blessing to listen to our Young Women leaders as well as from Elder Uchtdorf.  The talks focused on this year’s theme for our youth, “Stand Ye In Holy Places.”  As a Young Women Presidency we decided to watch the conference at one of our leaders’ home where we could enjoy dinner and dessert, then watch the conference together.  We decided on tacos which everyone loved.  I made the dessert, Peanut Butter Fingers.  Peanut Butter Fingers is one of my families’ favorites and I have always received lots of positive comments about them.  I did share the recipe at one time at a job I had years ago when we were putting together a work cookbook. Unfortunately the recipe I gave them got butchered by being combined with someone else’s recipe that was similar.  It took the best part of my recipe out in lieu of an easier option.  Well, after sharing my Peanut Butter Fingers with the Young Women I have had several requests for my recipe, so I am going to share it here where I know that no one can change it.  I wish I took a picture to add to this, but I didn’t think about it till after it was all eaten.  I had a few pieces left thinking I could take a picture of that, but of course, someone has gobbled that up.

Peanut Butter Fingers

This makes a full cookie sheet worth.

1 cup butter                                       1 cup sugar

1 cup brown sugar                           2 eggs

2/3 cup peanut butter                   2 tsp. vanilla

½ tsp. salt                                            1 tsp. baking soda

2 cups flour                                        2 cups rolled oats

                Mix together butter and sugars.  Add vanilla, eggs and peanut butter and mix well.  Add salt, baking soda, flour and oats.  After all is mixed well press on cookie sheet.  (I use my hands to press on cookie sheet).  Bake at 370 for 10-15 minutes or until top is light brown.  Remove from oven.  While still hot sprinkle chocolate chips on top.  Let sit so the chocolate can melt.  When chocolate is melted use a spatula to spread chocolate all over the top. 

Frosting:   1 cup powdered sugar              2-4 Tbs. milk                      2 Tbs. peanut butter.

Mix in a ball with whisk until well blended.  The frosting should be a little runny.   Drizzle frosting on top of Peanut butter fingers and spread.  Let cool and then cut into bars and enjoy.