Sunday, January 5, 2014

DIY Christmas Gifts


I had so much fun making these things for my family this year.  I have listed a link to some great tutorials.  I would love to hear from you and how you did with your projects.  Have Fun!

Cosmetic bags 


I included some lip gloss, mascara and eye shadow in these bags.  The perfect gift for the teen or pre-teen in your home.  Here is the link for the tutorial. http://craftsnob.com/2013/11/cosmetic-bag-pattern/

IPhone/IPod Case


There are lots of different tutorials that you can find on Pinterest to make these.


Reversible Bag and Coin Purse


Brianna’s cute little jean purse with a coin purse included.  She got money from her Grandma and Grandpa Losee and was excited to have a place to put it. 
Here is the link to the tutorial for the reversible bag


Tooth Fairy Pillow


She has been wanting a tooth fairy pillow for some time and so I bought a tooth fairy embroidery pattern, found a cute little poem online and wa-la.  An adorable pillow that she absolutely loves.


Notebook covers 


You can even put your tablet in it if you wish.  The girls really liked these.  I made Brianna something a little bit different.  Hers holds a coloring book and has pockets for her crayons.  Here is the link for the notebook covers.  http://www.rileyblakedesigns.com/blog/2012/02/01/design-team-wednesdaynotebook-folder-tutorial/


Framed Magnetic Boards 


I made these covering a sheet of galvanized metal that you find in the plumbing section at your hardware store.  I got mine at home depot.  I cut it to fit the frames I had and covered it with fabric.  I also covered the frame with fabric using spray adhesive and hot glue.  I then lined the inside of the frame using ribbon and added some embellishments.  I used buttons for the magnets.  I just snipped off the back of the button and hot glued the magnets to them.  I made these for the older girls.

Value Block


I made this with some wood I had out in the garage.  The wood was actually from some an old broken bed frame so the cost was minimal.  I printed this picture that I found online, mod-podged scrapbook paper to all four sides of the wood then mod-podged the picture to it.  I then added ribbon for hanging. I  made one for each of my two older girls.  

Here is the picture that I used.  This would make a great gift for your Young Women. 

Here are some other gifts I made this year. My mom made some beautiful skirts for all of her granddaughters.   I made my parents and my in-laws a quilted table runner. 


I have loved getting creative this year.  I have been experimenting these last few days with some bags.  I gave the smaller one to Katie who is using it as her scripture bag.  It’s perfect for putting not only her scriptures in but she can put her journal in it as well as her Faith in God book.  She was pretty excited to take it to church today. 

I am so grateful for the ability I have been blessed with to be able to do these things for my family and friends.  I am grateful that we are able to discover and develop our talents.  I am so grateful for this Christmas season.  I have felt closer to my family and I have felt closer to my Savior.  I am so grateful to a loving Father in Heaven who sent his only begotten Son here to earth.  King of Kings he was born in a lowly stable.  He lived, he died for us and he took up his body again that we too may live again. I know that he lives today.  I know this because of the gift of the Holy Ghost.  I pray that you all have had a wonderful Christmas season and that this New Year will be full of joy.


Braided Fleece Blankets Tutorial


Since I made Ally a quilt  for Chirstmas, I felt I should make everyone else something in that category.  So I decided on making my husband and other 3 girls fleece blankets.  Joann's had a great sale on all their fleece so it didn't cost a whole bunch to make these blankets.  I used 1 1/2 yards for both the bottom and the top for the girls and I used 2 yards for my husbands.  I wish I would have gone a little bigger for his because when he pulls his up to his chin his feet are poking out.  I decided to braid these blankets rather than tie.  It was so much simpler and it not only looks great but is way more comfortable than cuddling with knots.  


After they opened them Christmas morning I found myself sad that I had not made myself one, so the next day I had to go get me some fleece and make another one.  Ally is cuddling with mine in this picture.
To make the blanket you need 2 pieces of fleece cut to the size you are wanting the blanket to be.  I lay them down with the bad sides together and cut all the sides to where they are as even as possible.
I then cut out a 2 inch square from each corner just like in this picture. 
After cutting out the squares on all 4 corners we want to cut the edges just like you do when are tying it rather than braiding.  You cut 2 inches into the fleece with the flaps being 1 inch wide.  I line the blanket using masking tape or painters tape 2 inches up to help keep all the flaps even.  I also have my cutting mat laying underneath.  

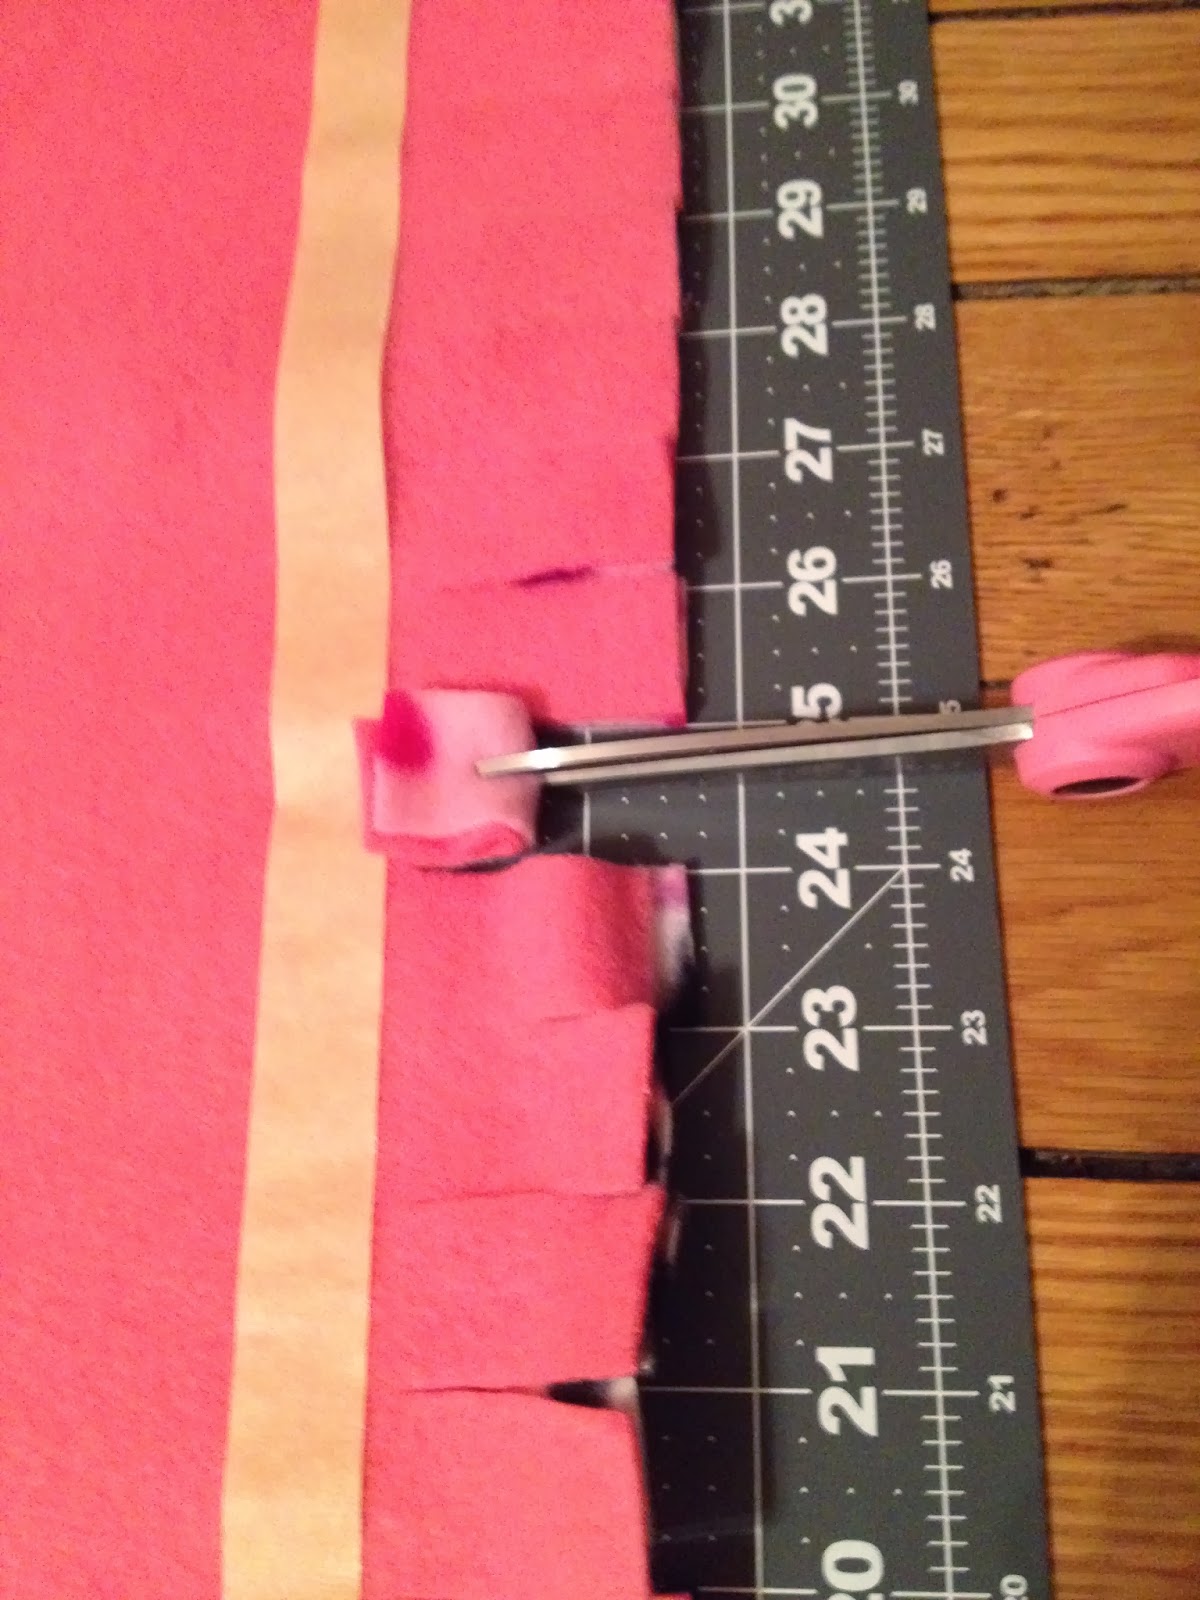
With all the flaps you want to make another cut through both layers.  This cut is just a slit in the middle of the flap just like in this picture. 


Now that your back is killing you from bending over this blanket doing all this cutting we get to the relaxing and enjoyable part.  Once you have finished with the cutting you can take your blanket and relax in your recliner to do the rest.
I use a crochet hook for this part but you can also use a bent paper clip or something similar.  It's totally up to you.  
Finding a starting point you are going to put your crochet needle through the top of the slit of your top piece of flannel then through the slit on the piece directly below the first one.  You then pull the second piece through the first just like in this picture.


Now go all the way around until you get to the last piece.  
With this last piece you are going to pull it through the flab you started with then cut up the center of that last flap to make it two flaps. Pull one of those newly cut flaps out of the slit of the first flap and tie a knot with the the other half flap.

And you are done!  


Monday, June 17, 2013

Girls Camp "Daughter of a King"


I decided that I wanted to share one of my favorite books with the girls while at camp.  This book is called “Daughter of a King” by Rachel Ann Nunes.  This book was given to one of my daughters several years ago for her birthday from her Grandma.  There is such a wonderful message in this book and it truly pertains to all of us.  I wanted to have something to give the girls to go along with this.  I have a whole bunch of these wooden squares left from a project I was doing last year, so I thought I could make a pendant out of them.  I printed out the little message and mod podged them onto the painted wooden squares.  After several layers of mod podge I put some resin on top and let dry overnight.  I then drilled the holes and threaded onto some cord.  I embellished with some beads.


I will have to let you know how these do at camp.  Wish me luck.


Sunday, June 16, 2013

Girls Camp Prescription Bottles


I found this idea off of Pinterest.  Where else would I go?  I am so addicted to that site. Aren’t we all?   I found these neat pill bottles with a cute little prescription for skittles geared towards Girls Camp.  I decided to make these as one of my pillow treats. The site I got this from a site called Burlap and Denim.   You can download the labels from this site. The label says that the quantity is 100, but I could only fit about 60 skittles in each bottle, so I’m going to give each girl a prescription for 1 refill.


Saturday, June 15, 2013

Girls Camp "Oh The Places You'll Stand!" (spin-off of Dr.Sues's "Oh The Places You'll Go!"

Oh The Places You'll Stand!

Girls Camp is right around the corner and I have been having all kinds of fun getting ready for it.  This year’s theme goes along with the mutual theme of “Standing in Holy Places.”  Our camp theme is a twist on Dr. Seuss’s book, “Oh, The Places You Will Go!”  It’s “Oh, The Places You Will Stand!” 

I am one of the leaders over the 4th year girls.  I have been so excited about going to girl’s camp this year.  I haven’t been to girl’s camp since I was 17.  I have been surfing the web to find ideas to go along with our theme.  I found so many and of course could not use them all, but I found some that were a must for me. 

I found this twist on the book “Oh, the Places You’ll Go!” on Jessica Herbert’s Blog, Sherbert CafĂ©.  http://sherbertcafe.blogspot.com/2013/02/oh-places-you-stand.html.  I absolutely loved it.  I then found pictures from the story that I pasted to paint and added the words.  This is how it turned out.